Sunday, February 21

Padded Hanger with Compartmentalized (is that a word???!!!!) Jewelry Bag

What the heck is that????  I'm not sure where this came from but I made my first one many years ago and I can't remember where I got the idea , pattern etc.  I know there was no paper pattern maybe a sketch.????

This is a neat deal it's  made with a plastic hanger,1/2 yard double sided quilted fabric,  a package of wide bias tape 3 yds. ( now you can make your own quilted fabric and bias tape, great way to use up scraps!!!!)a piece of clear vinyl 13"x141/2", 3 12" plastic zippers, 12" to 14" piece of Velcro, scotch tape, sewing machine, thread, zipper foot.

Start with the hanger and lay it on you quilted fabric and trace around the hanger, and make it 11" deep or long from the neck of the hanger.  Mark an opening so the hanger part of the hanger fits thru, thus a padded cover over the hanger.  Sew around leaving the opening and then sew down the opening around the neck of the hanger.  Sew on the bias tape around the bottom edge.  Sew on the Velcro above the bias tape so you can close up the bottom.

Now take the vinyl and lay it out in front of you the 13" across and 141/2" up and down.  Take a pen and mark a line going across the 13"   2" from the top, draw the next line 31/2" down and the third 41/2" down, so you have three lines going across the vinyl, this is you zipper placement.  Now take the zips and lay the teeth on the pen line, make sure the pull is against the vinyl, so you can unzip it!!!!!  Now take your scotch tape and place a few pices to hold it to the vinyl following the pen lines.  Put on your zipper foot and sew the zipper ro the vinyl.  Sew on the zipper tape, sewing on the vinyl is not always easy, kind of sticks!!!!  Now this is not fine tailoring so if you are a tad crooked no big deal!!!!  Sew in all three zippers in this fashion!!  Remove the tape.

Now sew the vinyl to the quilted rectangle, pin corners and sew with foot on fabric not vinyl. Use a small seam 3/8" or width of your presser foot.  Now turn this over and sew on the vinyl side the top of the zipper, so sew the top lines of all three zippers, you can sew right over the first row of stitching.  Then get out your pen and mark three sections in the top 2 sections and the lager bottom section divide in half.  These are the compartments to store your jewelry.  If you want, leave one undivided for necklaces or bigger pieces , whatever works for you!!!  Now sew these sections from the bottom of the zipper to the top of the next zipper, you have to make it so you can get to the compartments!!!!  Carefully take a ripper and cut on your pen line following the teeth of the zipper, make sure you got the stitching right so you can get to the compartment!!!!!open the zipper and there you have it!!!  Now sew on the bias tape all around the rectangle.  Instead of messing with the corners I just sewed on the top and bottom    and then the sides, much easier!!!

Then take the rectangle and sew it above the Velcro inside of the hanger cover, fold up your compartments and tuck inside and Velcro shut!!!!

I hope these instructions are helpful, this is probably not a beginner project.  I decorated this one with yo-yos, you could do appliques, monograms, add a tassel, sachet, or whatever.  The sky's  the limit.  This makes a great gift or just a great organizer for your own closet or travel wardrobe!!!

And I have to give a great big thank you to Bob for making this blog and website all come to be!!!  I couldn't do this without Bob so if any of you are looking to put together a website just check out , Robert's Webwork
I can't believe what it has done for my business, the results are amazing!!!!!

Monday, February 15

Sweater Mittens and Fingerless Gloves

Here's the latest and greatest in the Northwoods, mittens and fingerless gloves made from old wool sweaters!!!!  Last Friday Carolyn and I went to Diggers, that's a place where you rifle thru big boxes looking for good crap by the pound!!!!!  Wow, is that the place to hang out at, more stuff than you can imagine.  We dug thru many boxes and found about a half dozen wool sweaters, as you might know these are very popular so not that easy to come by.  The last couple of years several companies have formed making these little gems to sell.  They retail anywhere from $30. to $80., all made from old wool sweaters that have been washed and felted, they are lined and really quite warm and toasty.  Some folks are making them as a non profit others for profit, either way they are fun to do and pretty neat!!!

I took and old sweater I had, it was not all wool but did shrink up and looks good.  I made the mittens after a set I had in the shop that had a hole in them, drafted a pattern and voila mittens!!!  Then Carolyn made some of the newest fingerless gloves, as you may or maynot know these are the lastest rage for texting on your cell phone!!!  Seeing as I wouldn't know the first thing about texting I thought they'd be great for shopping, getting keys out, driving, you know the more practical things old ladies do!!!????  So I cut off the sleeve about ten inches up, tapered it to fit my arm and serged the top, pressed it down and did a blanket stitch along the top.  They are very simple and fun to wear!!!

Recycling at it's finest!!!!   I just can't get enough of the recycling, upcycling, it's so much fun to see what you can do with discarded items!!!!  Or just the stuff you have lurking in the back of your closets or drawers!!!!
Have a great February, Spring is coming!!!!!!

Fabric Necklaces

I've been thinking about a fabric necklace for some time now and finally decided to try this out!!! 
 I figure this will work with a turtle neck or regular simple neckline on shell, tank, t-shirt etc. 
 I just made up a shape and cut it out of some black wool, a piece of batting and some lining.  
Then I took apart some ties and cut the strips, they of course are already on the bias, and sewed it on the back and folded to the front and hand stitched it down. 
 Then I made little flowers and leaves and yo-yo's out of the tie fabric, and used some ribbon and buttons.
  I put the ribbon and bias down with embroidery floss and french knots.  
This is a fun project that has no limits you can use any left over scraps of anything, yarn, floss, beads, buttons and do dads you have charms, old jewelry, the  sky is the limit. 
 These are the first three I envision dangling beads, fringe etc and different shapes.

What a great way to use up left over scraps and stuff!!  And you can personalize them with initials or favorite items for a keepsake, bridesmaid or bride gifts, grandparents the list goes on and on!!!!

Hope this gives you some ideas, again, I look forward to seeing what you come up with!!!!!!


Saturday, February 13

Naturally Dyed Scarves, the tutorial!!!

 
Note

One the scarves we are using are the Habotai silk scarves and the size is 14"x72"
The deodorant is really an anti-antiperspirant, it has to have aluminum in it as a mordant to make the dye process work.  I prefer copper or metal wire as it leaves interesting markings on the scarf.


Hello, I finally decided to put together a tutorial on the way I do Naturally Dyed Scarves.  Our Sewing Guild was lucky enough to have a local gentleman give us lessons in his way and now I have put together a few of our own ideas from me and some guild members.

                                                       JUST CLICK PICS TO ENLARGE


Blank silk scarves are available from Dharma, I am using a 14"x72" scarf, all silk, hemmed and ready to go, very reasonably priced.  Cover your work surface with plastic, get together your supplies, white vinegar, red wine, veggies, teas, spices, blackberries, blue berries, concord grapes, coffee grounds, beets, beet juice, red cabbage, parsley, flowers, ferns, leaves.  Think in terms of what stains your clothes, red wine, spagetti sauce, grass, etc.  string, copper or metal wire, pennies, deodorant and gloves.  A hammer is good for pounding the color out of flowers or the image of green fern leaves.


Spray scarf with deodorant if not using wire, lay out scarf fill 1/2 with matter fold other half of scarf over the matter.


Roll and fold up scarf wrap with wire or string.  Fold and roll on the diagonal, straight whatever pleases you and wrap and roll and secure with the wire or string


This scarf is covered with shredded carrots which will give off a greenish color.  There is also tea and other spices fold the half over and place a few pennies on the scarf.


Roll up and wrap with the copper wire.


Place rolled up secured scarves in baggies, saturate with 1/2 plus cup of white vinegar.  Place baggie in another container in case it leaks.  Leave to soak for at least 3 days and for as long a 2 weeks, flip over to distribute the vinegar, rewrap the wire if you want, it's up to you.  I have found that 3 days is plenty as the longer it soaks the more muted it becomes.


Remove scarves from baggie, discard matter,( not on your grass, it kills the grass) in garbage can. Do not rinse the scarf at this point you are setting the stain. Hang the scarves somewhere the drips don't matter, if using bath tub you'll have to scrub.  Let dry a day or so. If you have a clothes line let it dry in the sun for a couple of days.  Hand wash in mild soap (like Ivory).


This is where it gets interesting,  press the scarves while they are wet on silk setting, they press out beautifully, the scarf done with the blackberries appears to be very pink when dried, then after washing it looks very purple and after it is pressed/dried it is lavendar with pink and purples, greens and copper wire lines.


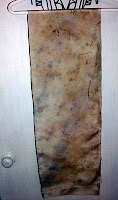
                                                     This is the scarf done with the carrots, tea, wire etc.
                                                                                                             plus a closeup


                                       Scarf done with the blackberries, tea, wire, etc. and closeup


A few ways to wear your new scarves!!!

This is not rocket science and it's nearly impossible to give fool proof recipes for one color or another, I do know that instant coffee, coffee gounds, and dirt with be brown and nothing will over ride the brown, so you can't get purple or red once you have gone brown.  Personally I don't like brown so I wandered off to other colors, beets make  pink and red, carrots go for greens, black and blue berries navy, purple and blackish, strawberries yeild nothing.  Herbs like parsley, mint, basil work well, microwaving them first releases some more color.  I have tried to use this dye technique on cotton and it is not that great, so don't waste your time trying this on a t shirt etc.  Just use your imagination, check online and you'll have lots of fun!!!  This is a great project for all ages!!!

Email me your creations, love to see what you have come up with!!!!!

Sunday, February 7

More Hats, Mittens and Headbands!!!!

Last Friday some of the gals from sewing guild got together and whipped up some hats, mittens and headbands for kids going without!!!!  It's really lots of fun to get together and chew the fat and stitch up some cute little fleece accessories!!!  Fleece is so much fun to work with because it does not ravel and you can use a straight stitch or a serger.  The only thing you have to remember is which way you need your stretch going.  So with the items we made the stretch has to go around so it fits nicely on the head or hand!!!!  And in fleece the stretch is cross grain not with the grain or selvage.

We are getting geared up for the All Dressed Up Event put on by the Junior League here in Madison.  On March 20 they will set up at MATC Truax location and distribute hundreds of prom dresses for free.  The dresses are donated to the League, Klinke Cleaners cleans and presses the garment, shoes, jewelry and accessories are also donated and girls come to shop and we, the sewing guild, do minor alterations, hems and straps.  So what a cool event, girls can get all dressed up for the prom basically for free and  have a complete ensemble including alterations.  Some of our gals are making clutch bags for the girls out of old prom dresses so we're taking recycling to the fullest!!!!

As you might remember I did a blog on the recycled wine or bottle bags we made last year from the leftover prom dresses, we'll repeat that again this year and do some other fun things, more later on that!!!!

Happy Recycling and Sewing!!!!!